I've been using SISTRIX as an SEO consultant since 2014. It's the tool I open every morning to check how my clients' projects are doing. And one day, while looking on Etsy for a gift for a nerdy friend, I saw LED panels showing stock and crypto prices, and I thought: what if I had an LED panel on my desk that showed my clients' visibility, rotating automatically?
It was technically possible, but I also knew I'd be getting myself into a real mess. Years ago I did projects with the Raspberry Pi and the ESP32, and I've even built mods for the Flipper Zero, but they were a headache. So the idea sat in a drawer for years, gathering dust next to those little toys.
Until I started working with Claude Code in November.
In this tutorial, I walk you through how I developed and assembled the Waveshare LED panel with the Raspberry Pi. I've made the project open source, and you can find the code here.
What the panel does
A 64x32-pixel RGB LED panel driven by a Raspberry Pi 4. It connects to the SISTRIX API and rotates through domains, showing: label, Visibility Index value, percentage change, country, mode (weekly/daily) and a sparkline with the trend. Plus a customizable brand card with a pixel-art logo and an animated scrolling message.

Everything is managed from a web panel you can access on your local network. The web panel includes an LED simulator that mirrors exactly what you see on the physical screen, so you can test everything without any hardware.
Some things I like about it:
- Visual layout editor: drag and resize each element right on the simulator
- Smart caching: saves API credits by only querying when there's new data (daily after midnight, weekly after Monday)
- Web <-> LED sync: current slide and on/off state synced in real time
- Physical button to turn it on/off without reaching for your phone
- 6 languages, responsive, accessible (WCAG 2.1 AA)
- Colors: hex, rainbow and two-color gradients — all configurable
All the code lives in two Python files: display.py (LED driver, ~1,000 lines) and web_panel.py (web panel with simulator, ~3,700 lines). No frameworks, no npm, just pure vanilla JS. The frontend is inlined inside the Flask app. If the project were bigger, I'd rethink this for maintainability.
The hardware: Raspberry Pi + LED Matrix Panel
The links below are Amazon affiliate links: if you buy through them, I get a small commission. Hey, I put a lot of work into this 😀
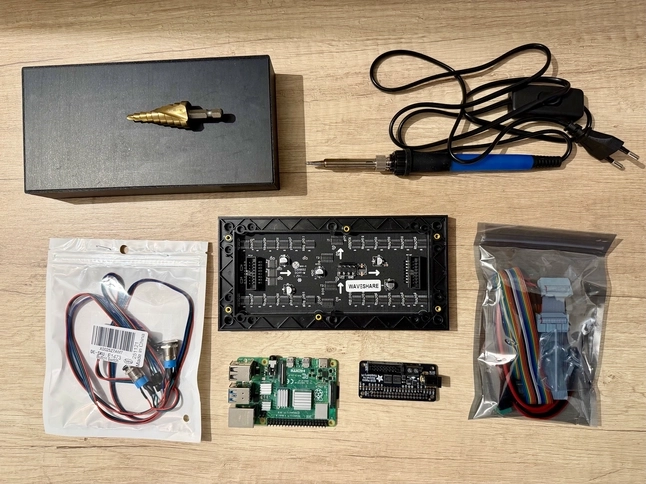
Must-haves
- Raspberry Pi 4 4GB Starter Kit - Important: I tested it on a Pi 4; when I built it, the hzeller/rpi-rgb-led-matrix library didn't support the Pi 5 (support was added in April 2026). Stick with a Pi 4 or earlier (you may need to tweak
--led-slowdown-gpio for performance reasons).
- Waveshare 64x32 P3 LED panel - 192x96mm, 3mm pitch (P3 = 3mm between each LED).
- Adafruit RGB Matrix Bonnet - A HAT that connects the Pi to the LED panel via GPIO. It plugs straight in, no soldering needed.
Optional (but recommended)
- Gebildet 12mm push button - Stainless steel with a blue LED. Turn the panel on/off without touching your phone.
- 60W soldering iron kit - To solder the button wires to the GPIO pins.
- Flintronic step drill bit - For clean holes in the case without cracking the plastic.
- 3D-printed case - I asked a friend to print me a custom one (192x96mm, 13-15mm deep). If you don't have a printer, search Etsy for "64x32 P3 LED panel case".
- M3 screw set (560 pieces) - It comes with everything: various lengths, nuts and washers. So no matter how deep your case is, there's bound to be one that fits.
- 5V 3A power supply - With a 5.5x2.1mm barrel jack connector. It's optional if you use low brightness (<50%), but recommended. Without it, the panel is powered through the Pi's GPIO, which can handle up to ~1.2A. At high brightness or with very bright content on screen, this can cause reboots. With this setup, I've tested it and found the power supply isn't needed.
Step-by-step assembly
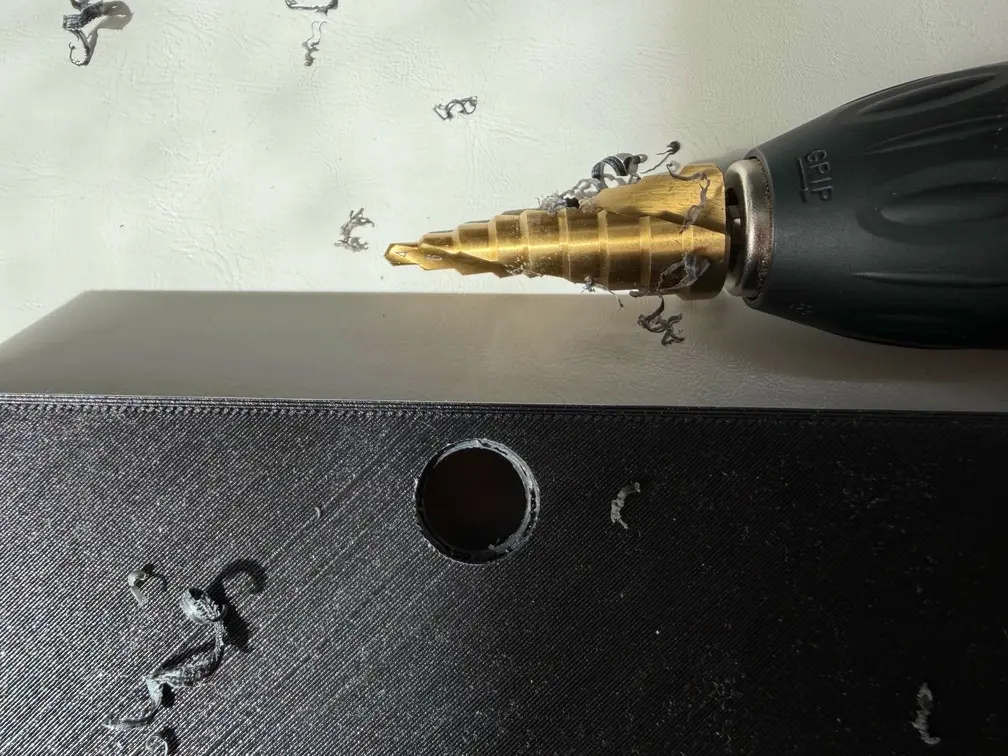
1. Prepare the case: use the step drill bit for the holes. I made a 12mm one for the button and a smaller one for the ribbon cable and the power cable. For me, the step bit is key, because a regular bit cracks the plastic, while this one widens the hole little by little. You could also do it with a hot iron or a soldering iron, but it's not the same.
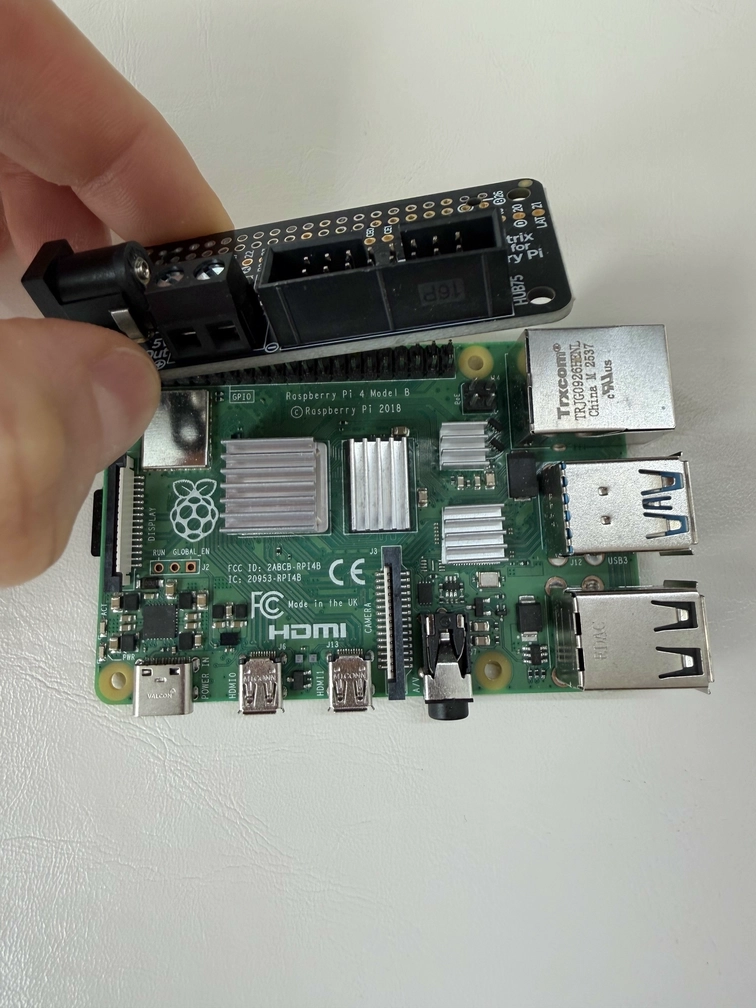
2. Fit the Bonnet onto the Pi: press down until it seats on the GPIO pins.
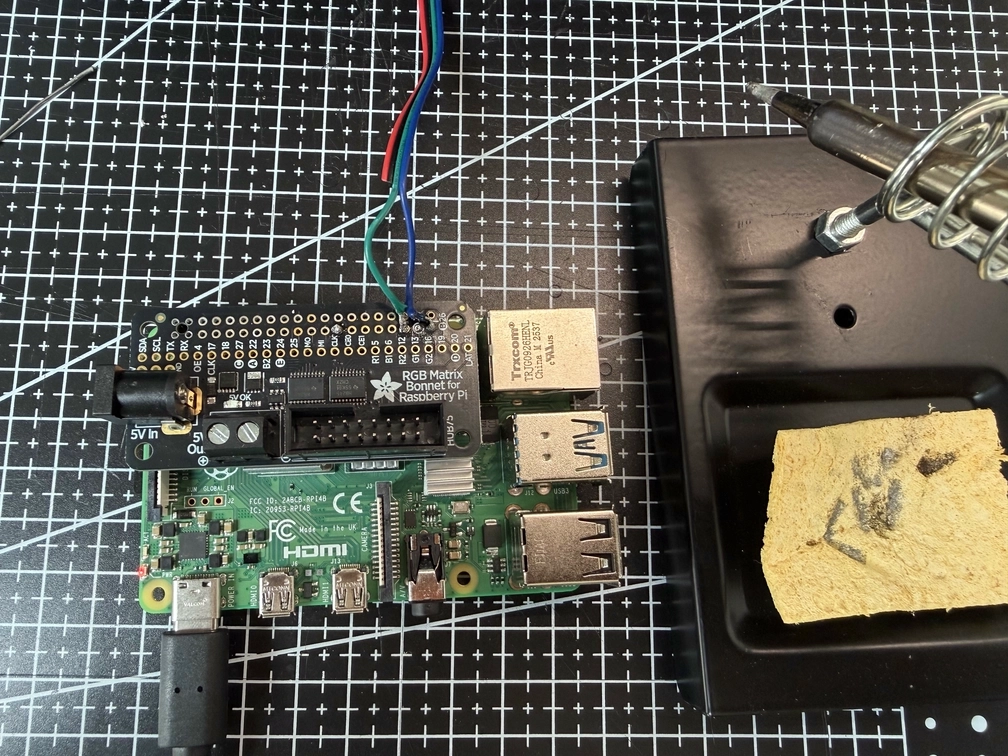
3. Wire the button (optional): one terminal to GPIO 19 (pin 35), the other to any GND. Polarity doesn't matter. I used pin 39 for ground. The signal wire only ended up on GPIO 19 (pin 35) after 2 failed attempts, as you can see in the photo (turns out the matrix uses almost all the pins).
4. Connect the ribbon cable: from the panel to the Bonnet's HUB75 connector. It only fits one way (it has a notch).
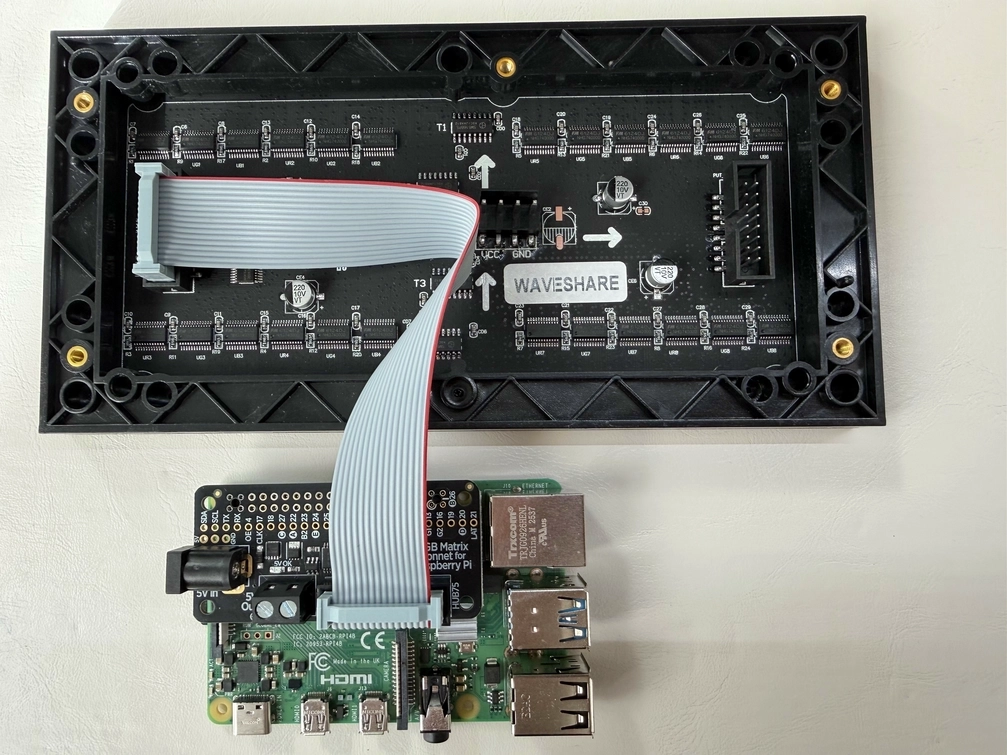
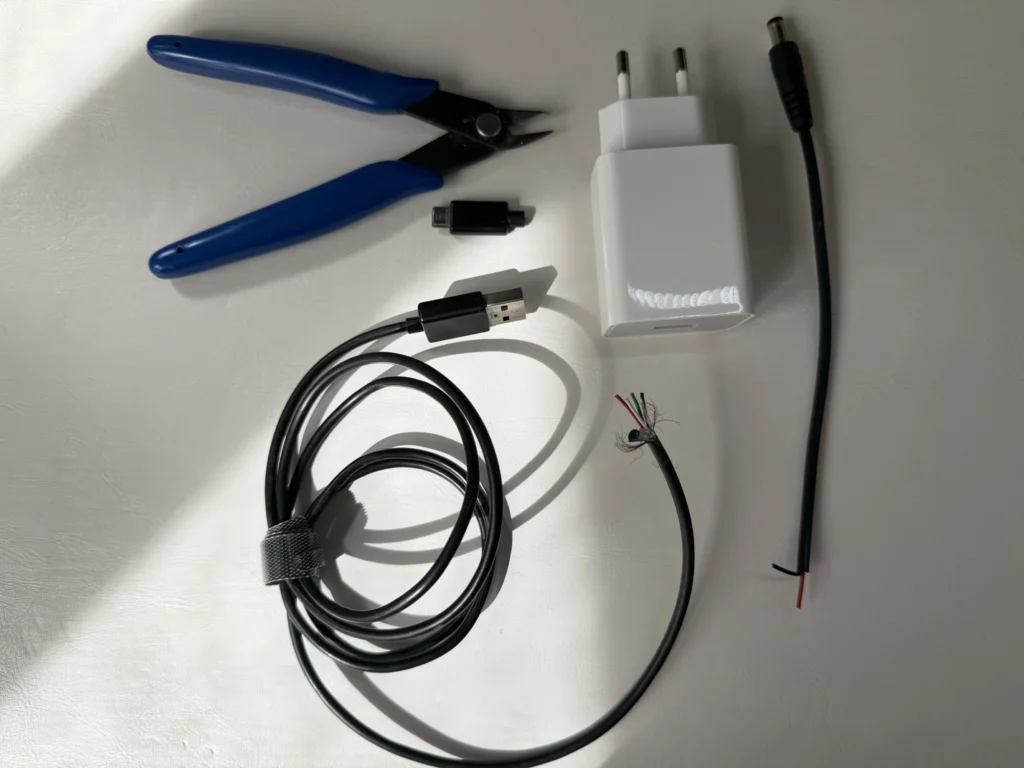
5. Connect the panel's power supply (optional): 5V power supply to the Bonnet's barrel jack. I didn't have a barrel jack adapter rated for the power the panel needs, so I rigged one up with an old 5V 3A USB charger from a Meizu phone, a 5.5x2.1mm barrel jack cable that I cut off another 12V power supply I wasn't using, and a USB <-> micro USB cable that I also cut and soldered. It works perfectly, and I saved the money and the wait for shipping. If MacGyvering isn't your thing, just buy the power supply. UPDATE: I've found that it works safely without this extra power supply, so even better, one less cable.
6. Power on the Pi: via USB-C. If everything is fine, the panel lights up within seconds.
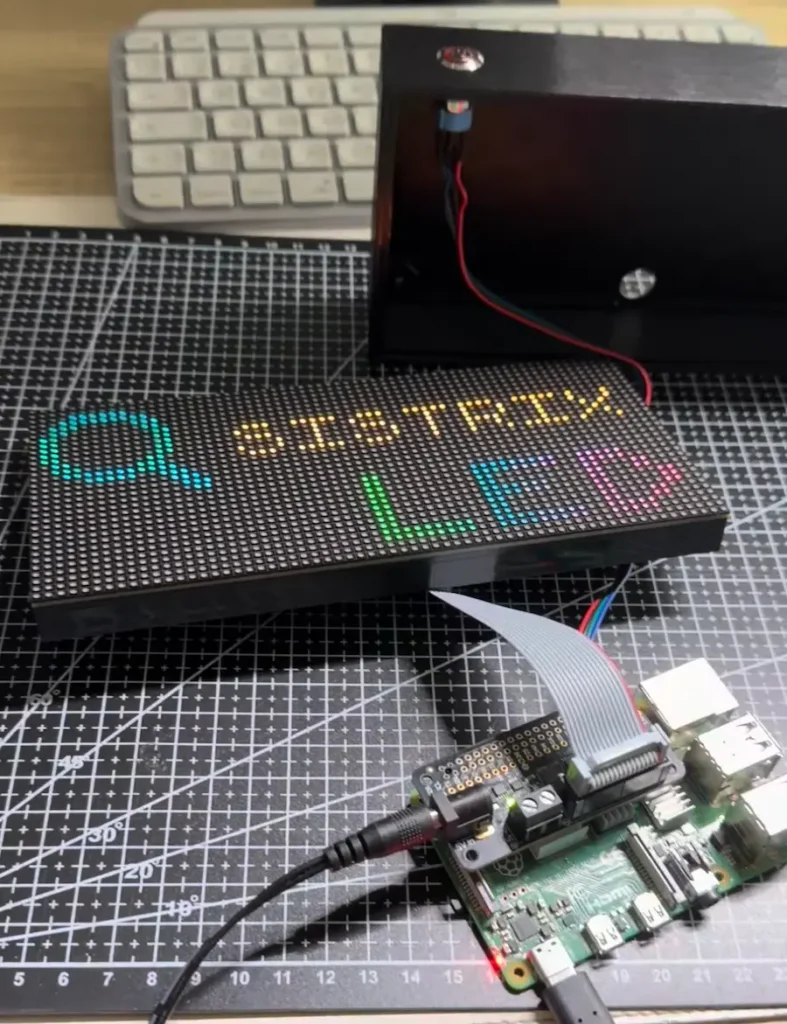
7. Attach the panel to the case: once everything works, unplug the cables and run them through the holes. Screw the panel in at the corners with M3 screws.
How to install it
I've made the project open source and it's on GitHub. If you want to build it:
- Install Raspberry Pi OS Lite 64-bit on your Pi 4
- Clone the repository and run
bash setup.sh
- Install the LED driver from hzeller/rpi-rgb-led-matrix
- Open
http://raspberrypi.local:5001 from any device on your network
- Set your SISTRIX API key, add domains, and you're done
No hardware? You can try just the simulator:
pip install flask pillow requests
python3 web_panel.py
Open http://localhost:5001 and that's it.
Problems I ran into
The button and GPIO drama
I connected the button to GPIO 26. Without the LED panel, it worked perfectly. But as soon as I started the panel driver... it stopped working. The Bonnet uses almost all the GPIOs, and 26 is one of the multiplexer lines. I tried 25, same problem.
In the end, GPIO 19 (pin 35) was free. But that wasn't the end of it... the button would turn the panel off and immediately back on, or it only worked once. The problem was level detection, and the fix was rising-edge detection (LOW->HIGH transition on release), which fires exactly one event per press.
The white that came out orange
In the web simulator, the text looked pure white. On the LED panel, orangey. The red and green LEDs on these panels are brighter than the blue ones. My fix was selective color correction for whites and grays only (R down 10%, G down 8%), while saturated colors are left untouched.
Brightness and PWM
At brightness 60, many pixels in the same digit looked brighter than the rest, and there was visible shimmer on large digits. The sweet spot I found is brightness 42, PWM bits 8 (pwm_lsb_nanoseconds 300). Smooth gradients, no shimmer, and bright enough during the day without blinding you at night. With a more professional panel, you might need to change these settings.
The SSH that broke by itself
One day SSH started hanging on connect, and .bashrc was printing text in non-interactive sessions, which broke SCP/SFTP. I had to hook up a monitor and keyboard to the Pi to see what was going on. So the best thing to do is wrap the echo commands in your .bashrc in if [[ $- == *i* ]].
Syncing
This sounds trivial, but it was the hardest thing to solve. There are two independent processes: the display.py script, which controls the LED panel (it runs as root to access GPIO), and the web_panel.py script, which serves the simulator in the browser. Each one has its own rotation loop, its own state, its own idea of which slide it's showing. The problems showed up one by one:
- Changes that took 60 minutes: you'd remove a domain in the web panel and the LED panel wouldn't find out until the next API refresh. Now it checks for changes in the domain list on every cycle and reloads from cache instantly.
- Blocking fetch: when the display made an API call to SISTRIX, the panel froze for several seconds on the last frame (usually the brand card). We moved the fetch to a background thread.
- Out-of-sync rotation: the web panel had its own rotation timer, independent from the LED panel. Now the web panel is a "slave" to the LED panel when the service is running, and follows its slide in real time (3-second delay) via a shared state file.
- Interrupted editing: you'd be editing the brand card in the web panel and suddenly the slide would change because the LED panel kept rotating. Now edit mode pauses all syncing.
- Out-of-sync power-on: you'd hit ON and each one started on a different slide. Now both start from slide 0.
- Dead button on the brand card: the physical GPIO button didn't respond while the brand card was showing, because the scroll loop wasn't checking the button.
Each of these bugs looked simple, but fixing them meant understanding the whole flow between two processes, a shared config file, a state file, JavaScript timers, a Python loop and a physical button. The AI fixed each bug on its own, but it couldn't see the system as a whole, so it was like playing Whac-A-Mole. I had to spot the problems by testing on the real hardware and explain to the AI what was going on.
The security bugs
This one worried me in particular, because the AI-generated code had A LOT of holes:
- Exposed API key: the
/api/config endpoint returned the SISTRIX key to the frontend in plain text.
- XSS: domain names were inserted without escaping. A
<script> in the label would run.
- No security headers: no
X-Content-Type-Options, no X-Frame-Options, no CSP.
- No input validation: a label could be anything, with no sanitization.
AI writes working code fast, but security is NOT one of its default priorities. You have to audit everything!
The missing characters (and my daughter)
The panel uses its own bitmap fonts, where each character is a hand-defined pixel grid. Claude generated the alphabet and the numbers. All good until my eldest daughter (7) wanted to put her sister's name and her own on the custom card, like this: "Chloe & Lía".
That's when we saw that accented letters were missing, along with $, %, &, (, ), =, #, @... The two of us sat down with graph paper to design the 3x5 and 5x7 pixel characters. She filled in the little squares, I translated them into bits, and by the end she was converting them herself too. We also fixed letters like S, X and W, which looked horrible in Claude's 5x7 version, redrawing them by hand on paper. I could have delegated this part to Claude, but then I'd have missed a chance to teach my little one how a screen works.
The rainbow color was her idea too, and that's also where the configurable two-color gradients came from.
Building with AI: what I've learned
I've been using generative AI since I got access to the GPT-3 beta in 2020. I built this panel entirely with Claude Code. In other words, this isn't an experiment or my first time; it's been the way I work for years. But what Anthropic did with Opus in November 2025 was a turning point. So I wouldn't have taken on this project without that leap.
In February 2025, Andrej Karpathy coined the term "vibe coding", which means "accepting everything the model generates without reading the diffs and forgetting that the code even exists". A year later, he walked it back himself and now prefers "agentic engineering". Makes sense... because going with the vibes works for throwaway weekend projects, not for production.
I never liked the term. What I do is closer to what Kent Beck calls "augmented coding". In vibe coding, you don't care about the code, you just want it to work; in augmented coding, you care about the code, the tests, the coverage. AI amplifies your vision and your ability to break problems down, but it doesn't replace your judgment.
Simon Willison, co-creator of Django, nails it when he says that reviewing AI-generated code is often harder than writing it yourself. You have to reconstruct the intent and catch what the model ignored. You go from writer to supervisor, and that takes a lot more judgment. And that's exactly what happened with this project.
What works well
Claude Code handles the whole workflow from the terminal in natural language. "Upload display.py to the Pi and restart the service" -> SCP, SSH, systemctl restart. "Commit" -> it analyzes the diff, writes a sensible message and makes the commit. "The button doesn't work, check the log" -> it SSHes into the Pi, reads the logs, identifies the problem and proposes a fix.
That's how we solved the GPIO issue, the debounce, the edge detection... I didn't know which Bonnet pins were taken, and Claude analyzed the pinout and found them. Without AI, this would have been a living hell.
What doesn't work
CSS and responsive design: every UI change broke something. Claude would move some padding and the mobile layout would fall apart. It would change a color and leave a button unreadable. It had no way to see what it was doing.
The fix I came up with a few months ago, so I wouldn't burn tokens on Computer Use, was to hook Puppeteer up to Claude Code. A script that takes screenshots on desktop (1280x900) and mobile (390x844), which Claude ran on every upload, reviewing every visual change before uploading it. My interventions dropped by 80%.
Design system: the panel has CSS tokens (spacing, colors, borders), and by default Claude would drop inline magic values like margin-top: 13px, color: #3a7fc2... instead of using the variables, so no two buttons matched. I had to stay on top of it constantly, even when I saved the rule to its memory or to a skill.
Unrequested changes: you tell it "change the text color" and, while it's at it, it moves the numbers, changes a layout that was working, or "optimizes" something that wasn't broken.
Usability: AI builds features, but it doesn't think about the person who's going to use them. State handling, confirmation messages, logical flows... none of that comes naturally to it. If a button should be disabled while something is loading, it doesn't do it. If a destructive action needs a confirmation, it doesn't add one. If the order of the steps makes no sense to a user, it doesn't notice. 24px touch targets, modals that don't fit on the screen, forms that get
covered by the virtual keyboard... I caught all of that by testing on my phone. You have to be the one thinking about the experience.
The French disaster: the i18n lives in a huge JavaScript object with the strings for the 6 languages, which we added at the end. When adding the French translations, one badly escaped accent blew up the file's 3,700 lines. Blank screen, no clear errors, and Claude's bright idea was to re-indent all the code with a RegEx, leaving the whole project unusable. Luckily we had git, so we went back to the previous state.
How much this project would have cost without AI assistance
I used NASA's COCOMO calculator, based on the standard effort estimation model in software engineering, to measure it:
- 4,883 lines of code (hardware driver, bitmap rendering, cache, GPIO, full web panel with simulator, visual editor, 6 languages, WCAG 2.1 AA)
- Effort: 12.3 person-months
- One person, full time: ~12 months
- Equivalent cost: €100,000–140,000 at European market rates
But COCOMO is really meant for something else. It's built for teams, formal documentation, design phases, QA, project management. It assumes there's coordination between people, meetings, specs... None of that applies here. Plus, a good chunk of the lines are inline HTML/CSS/JS for the web panel, which isn't the same as systems code. For a solo dev's personal project, COCOMO wildly overestimates the effort.
A more realistic estimate: a full-stack developer with experience in hardware, LEDs and Flask would take maybe 2-3 months full time without AI help. I'm just an SEO consultant. I know some code, but it's not my job, and I had no experience with LED panels or GPIO, so probably 4-6 months if I could work on it 100% of the time. At 20-30% of my time, more than a year. So in practice, I'd never have finished it. That's why I never started it 🙂
With Claude Code, I did it in 3 working days. With bugs, with back-and-forth, with things it broke that we had to fix. But it works, and I think it's pretty robust. Though once more people use it, some issue I haven't had time to catch might pop up.
It's not that AI does the work for you. It's that projects that weren't worth it before, given the effort-to-result ratio, are worth it now. The bar for what you can afford to build has dropped dramatically. But you have to be the quality control: review every change, keep git up to date, audit security, and never trust it blindly. To me, this isn't vibe coding. It's engineering with a very fast copilot, but you can't take your hands off the wheel, at least not for now.
The project is open source. If you build one, let me know! I'd love to see more SISTRIX LED panels out there.